

A Swedish Fire Log also referred to as a Swedish Torch or Canadian Candle – is a highly efficient campfire for cooking. First developed by the Swedish army during the Thirty Years War, this type of campfire requires just a single log and can be made even when the ground is wet or covered in snow. It is also a quick and easy way to cook food while camping, especially if you have limited wood to burn. All you need is one log and an axe or a saw.
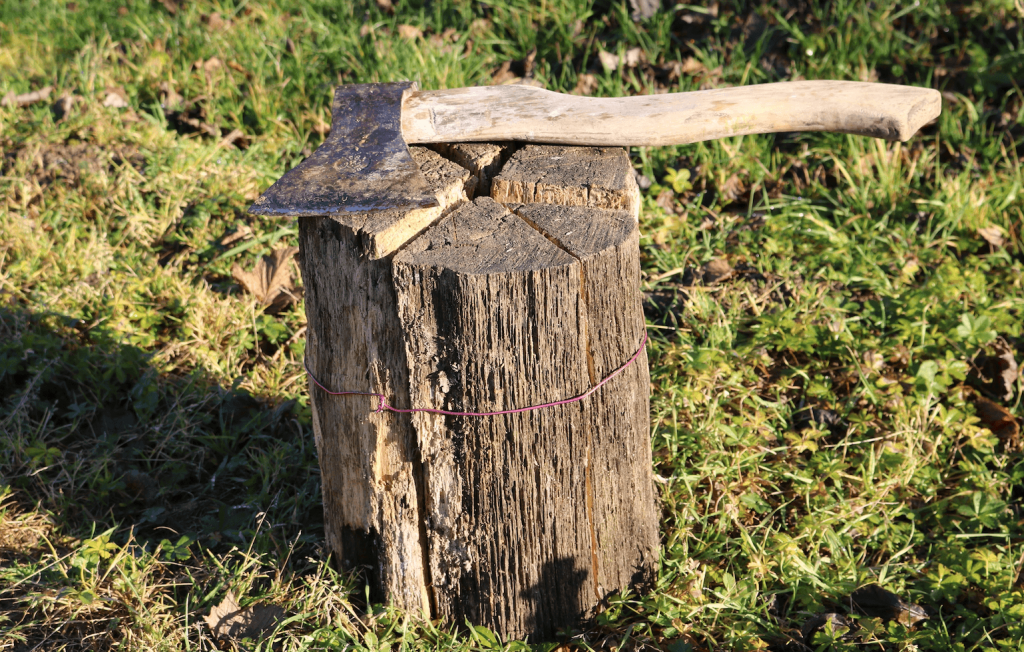
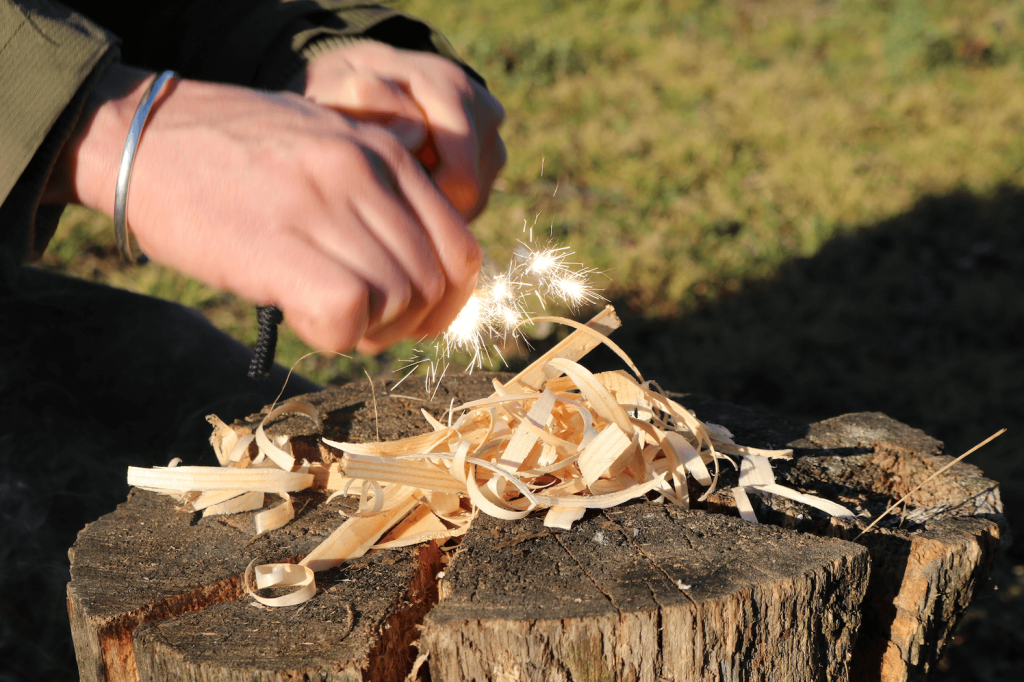
Find a log about big enough to hold a pan. Make sure that at least one end of the log is cut level so it will stand up straight on it’s end. Take your saw and make three crisscrossing cuts about ¾ of the way through if the ground is wet (prevents vaporized water moisture from putting the fire out). You can also go all the way through if splitting the log with an axe and use a wire to hold all the pieces together later as we did (it’s way faster than the saw).
Rough up the interior edges of the wood with a hatchet. These rough edges will catch embers as they fall down inside the log and help it start faster. You don’t have to do the entire log, just the leading edge that faces the middle.
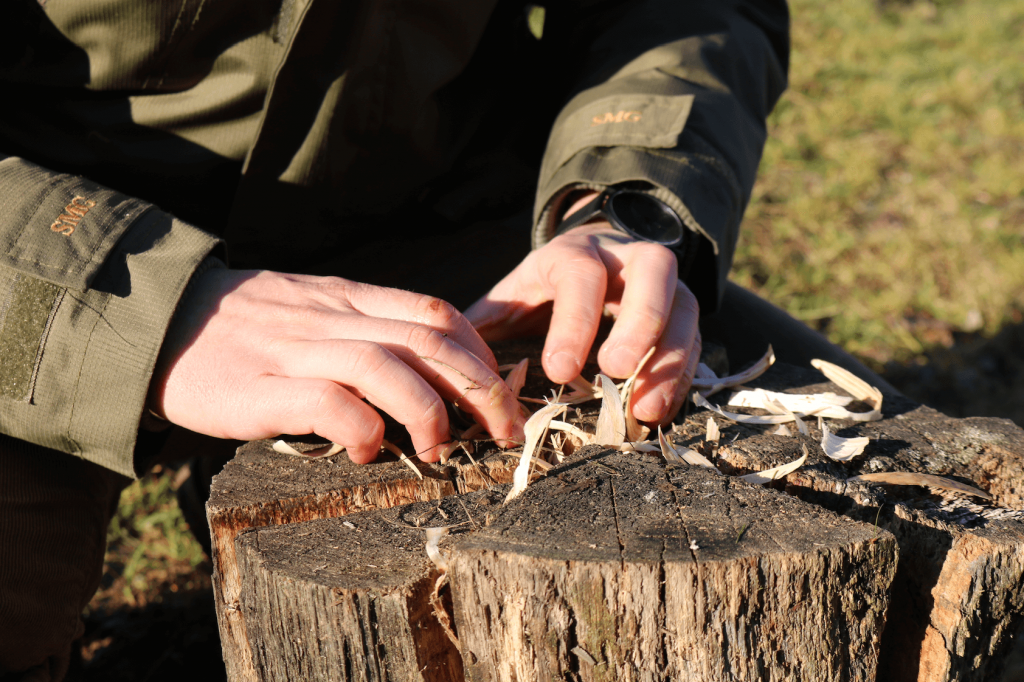
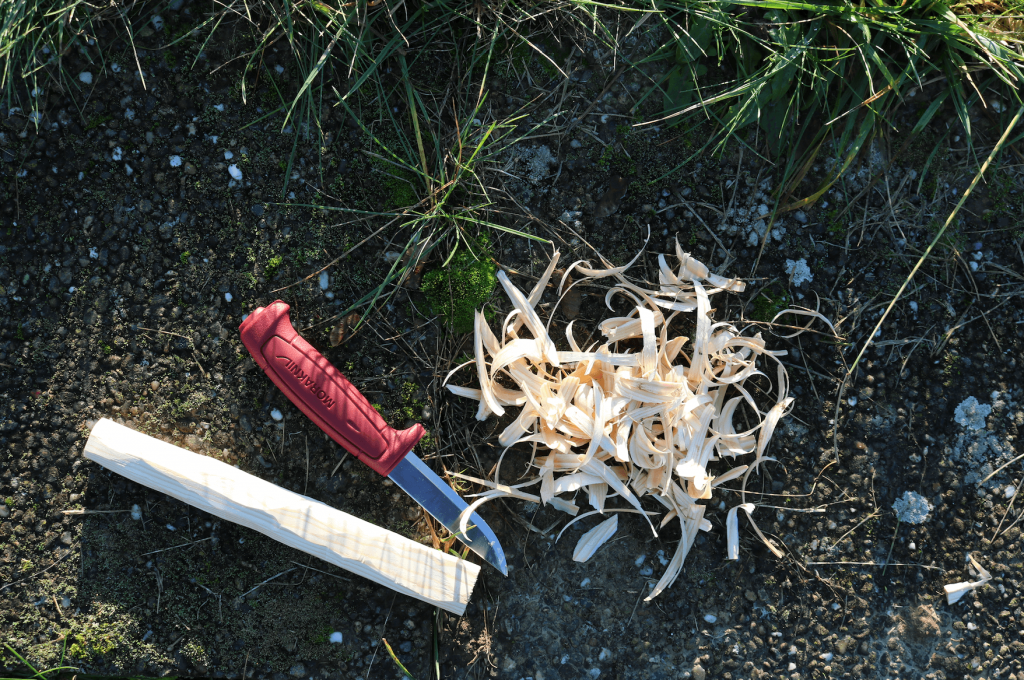
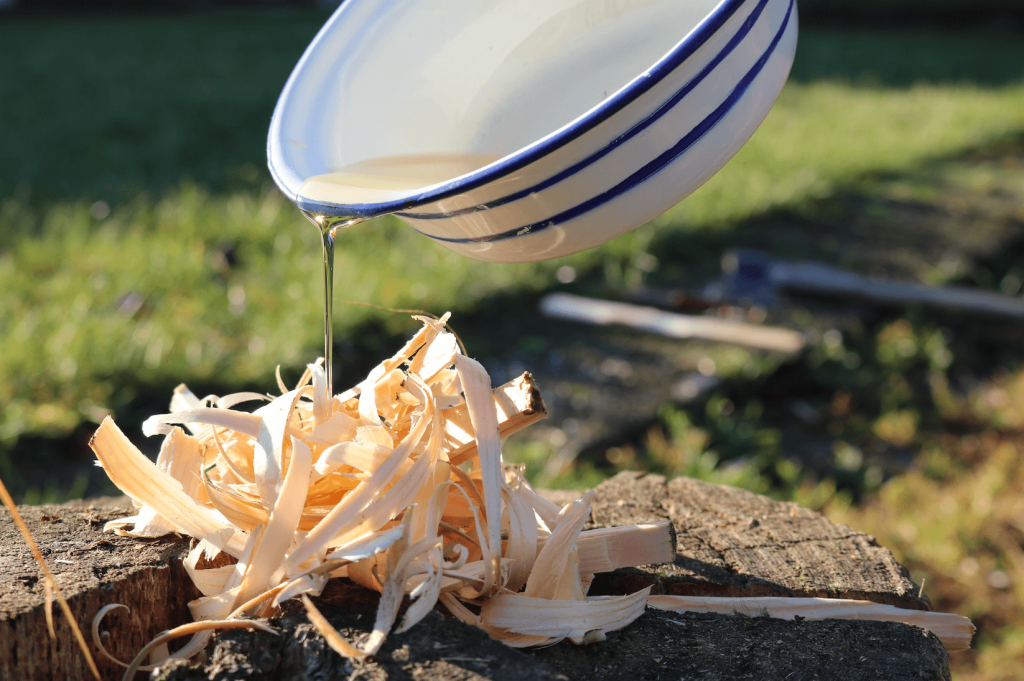
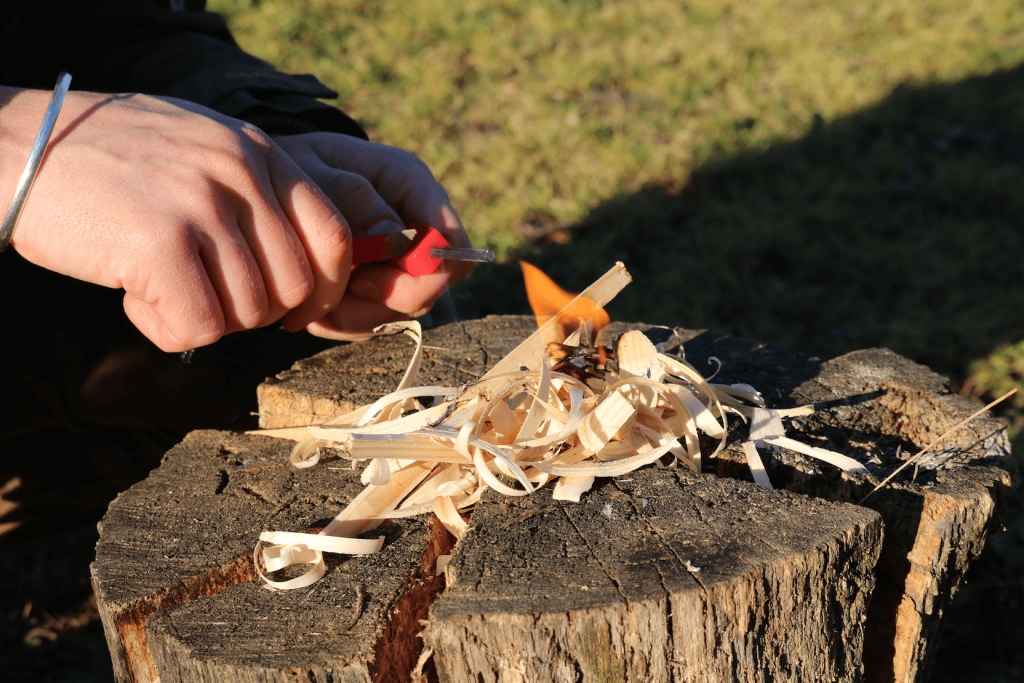
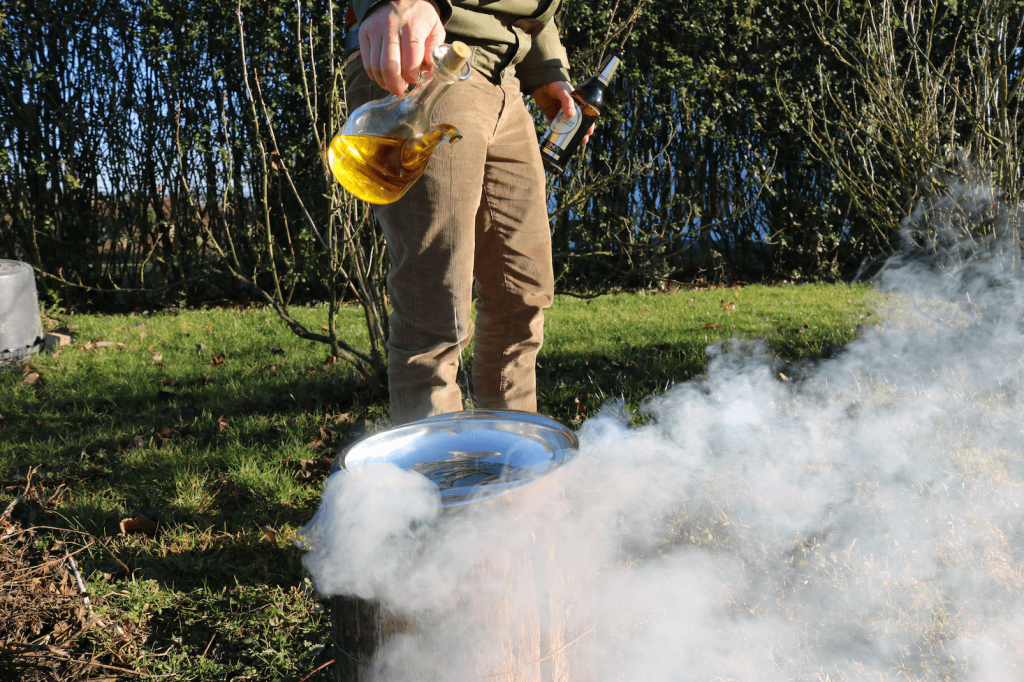
Make some kindling and push the smaller pieces in the log and leave the rest on top, we also pored some olive oil drops in the kindling to make it more flammable! Once you have this you are ready to go, start the fire and wait a little bit as it will take a while until it gets going. Eventually the coals and kindling will start to descend into the log. You may need to use a spare stick to shove it down into the center as it burns.
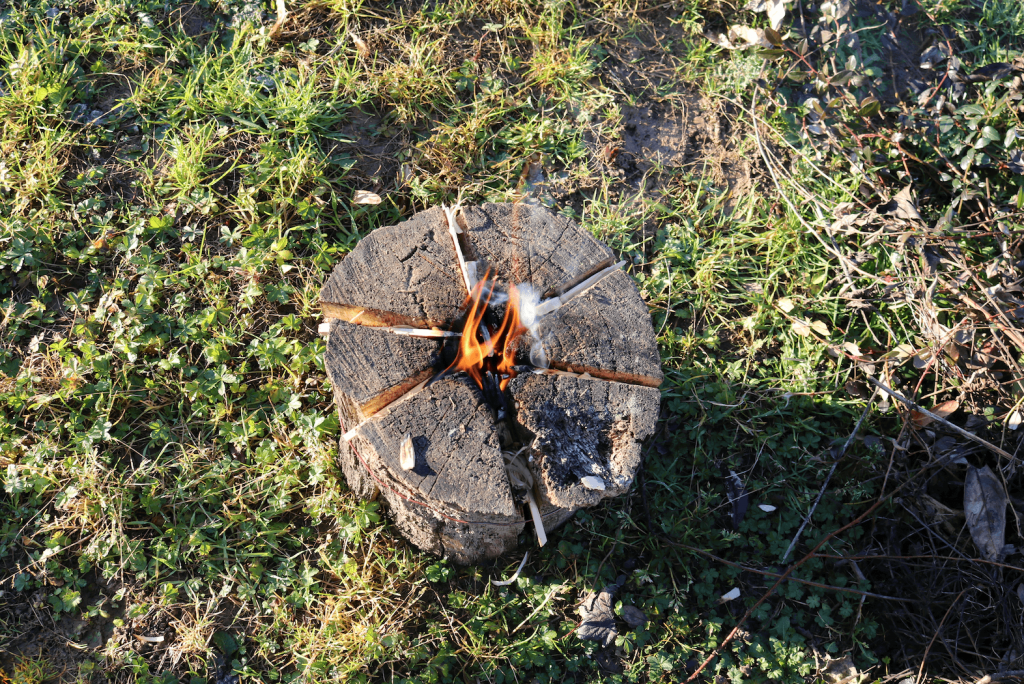
The beauty of the Swedish torch is that once you light it, you can basically forget it. The log will slowly burn from the inside out. The cuts through the log provide natural air flow that will keep your fire ventilated. It also doubles as a cooking surface and is perfect for holding cast iron pans.
The fact that the flame burns from the inside out (a directional flame), makes the Swedish Fire Log super efficient as it uses the least amount of wood in the longest period of time by giving to highest focal temperature.
Placing the end of the log face down gives you a flat surface on the top for cooking. Depending on the size of your log, this surface can easily accommodate a water kettle, dutch oven, or cast iron skillet.
Unlike most campfires that need occasional tending, the Swedish Fire Log is completely self-sufficient once properly lit. As embers burn at the top, they fall down into the log, burning it from the top down. Air is continually drawn in through the slits on the side.
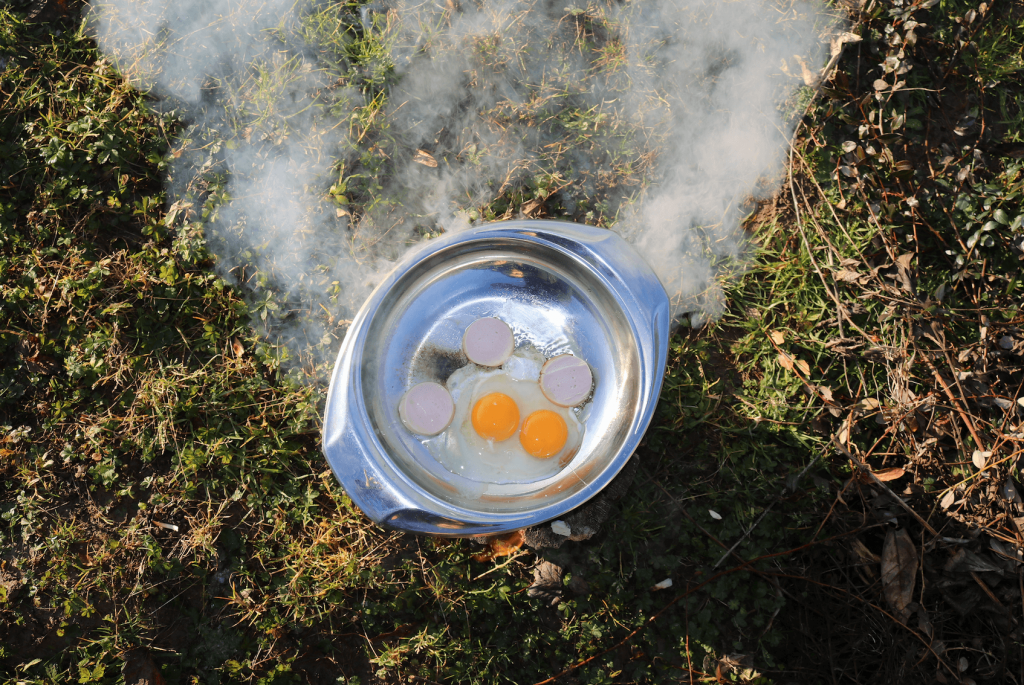
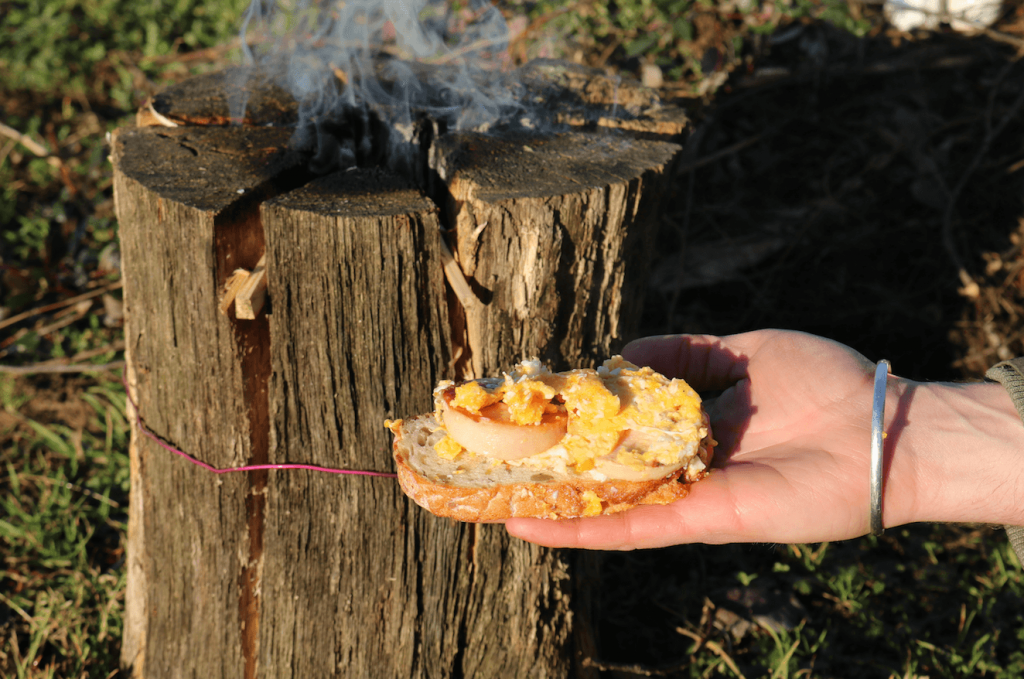
We tried it and despite we made some mistakes the log still performed as expected if not better. We made a super easy and quick brunch to test it and it tasted like heaven! The dog also took part in the feast but he didn’t wait to have it cooked.
ESPAÑOL>>>
La antorcha sueca, también conocida como la vela canadiense, es una forma eficiente de hacer un fuego para cocinar al aire libre. Fue inventada por el Ejército Sueco durante la Guerra de los Treinta Años. Este tipo de fuego tan solo requiere la parte de un tronco o un tocón y puede hacerse sobre superficies húmedas o con nieve. También es una manera muy eficiente de cocinar estando de acampada, especialmente si tienes recursos limitados de madera. Todo lo que necesitas es: un tronco, un hacha y/o una sierra.
Encuentra un tronco lo suficientemente grueso como para poder sostener el recipiente donde planeas cocinar. Cerciórate de que los extremos están cortados planos para que puedas colocar el recipiente encima y no se tambalee. Coge la sierra, córtalo en seis partes y para antes de llegar al final para dejar 1/4 sin cortar, así podrás hacer un fuego sobre suelo mojado ya que las brasas no generarán vapor que apague el fuego. También puedes partirlo del todo si lo haces con un hacha y juntar posteriormente todas las piezas con un alambre para que queden sujetas, así es como lo hicimos nosotros y el hacha es lo más rápido y satisfactorio!
Puedes hacer pequeños cortes en el interior de las paredes del tronco antes de volverlo a cerrar para que al caer las brasas vayan dejando pequeños incendios a su paso.
Corta unas virutas de madera, las más pequeñas mételas dentro del tronco el resto irán encima, en nuestro caso hemos decidido verter un chorrito de aceite de oliva por encima y no porque tuviera pinta de ensalada sino porque así el fuego se propagaría con más facilidad. Ahora ya solo tienes que encender el fuego y esperar a que las pequeñas briznas incandescentes vayan cayendo dentro del tronco y se empiece a retroalimentar. También puedes ir empujando con un palo las virutas en llamas para acelerar este proceso.
Lo mejor de la antorcha sueca es que una vez que ha empezado a arder ya te puedes olvidar de ella. El tronco se quemará poco a poco desde dentro hacia afuera. Los cortes en el tronco proporcionarán una fuente de aire y corriente natural que avivará el fuego. Además la superficie plana hace que este método sea ideal para cocinar ya que puedes colocar encima la sartén y funcionará como una cocina de gas.
El hecho de que la llama arda desde dentro hacia fuera hace de la antorcha un fuego muy eficiente ya que usa la menor cantidad de madera posible, durante el periodo de tiempo más largo posible (entre 2 y 3 horas), dando la mayor temperatura posible gracias a su calor focal.
Al tener una superficie llana donde poder cocinar puedes fácilmente utilizar una tetera, un hornillo, una parrilla o incluso una sartén de hierro ya que el tronco no tiene límite de peso.
Al contrario que otros fuegos con los que se acostumbra a cocinar al aire libre, la antorcha sueca se alimenta a sí misma por lo que no necesitas ir añadiendo combustible a lo largo del proceso. También puedes regular la fuerza del fuego separando las cuñas para que entre más aire y se avive el fuego o juntarlas para que se ahogue un poco y no arda tan deprisa.
Lo hemos probado y a pesar de cometer un par de errores el tronco se ha comportado como esperábamos si no mejor! Hicimos un tentempié rápido y fácil y nos supo a gloria. El perro también tomó parte en el festín pero el no esperó a que estuviera cocinado…